What is the Best Plaster Saw for DIY Projects?
When embarking on DIY projects, choosing the right tools is crucial. One essential tool for working with plaster is the Plaster Saw. This specialized saw offers unique benefits for cutting and shaping plaster with precision. According to a recent industry report, nearly 40% of DIY enthusiasts struggle with improper tools, leading to frustrating results.
The plaster saw is designed for efficiency, allowing users to make clean, precise cuts. Many homeowners are unaware of the specific features that separate a quality plaster saw from regular saws. Research indicates that improper saw usage can waste materials, costing DIYers time and money.
While it may seem simple, selecting the best plaster saw involves understanding individual project needs. Criteria like blade sharpness and handle comfort can greatly influence user experience. However, some may underestimate the importance of proper maintenance. A well-maintained plaster saw can last for years, making it a valuable investment for any DIYer. Ultimately, the right choice can enhance the quality of work and minimize stress in the crafting process.
Understanding Plaster Saws: Types and Their Uses
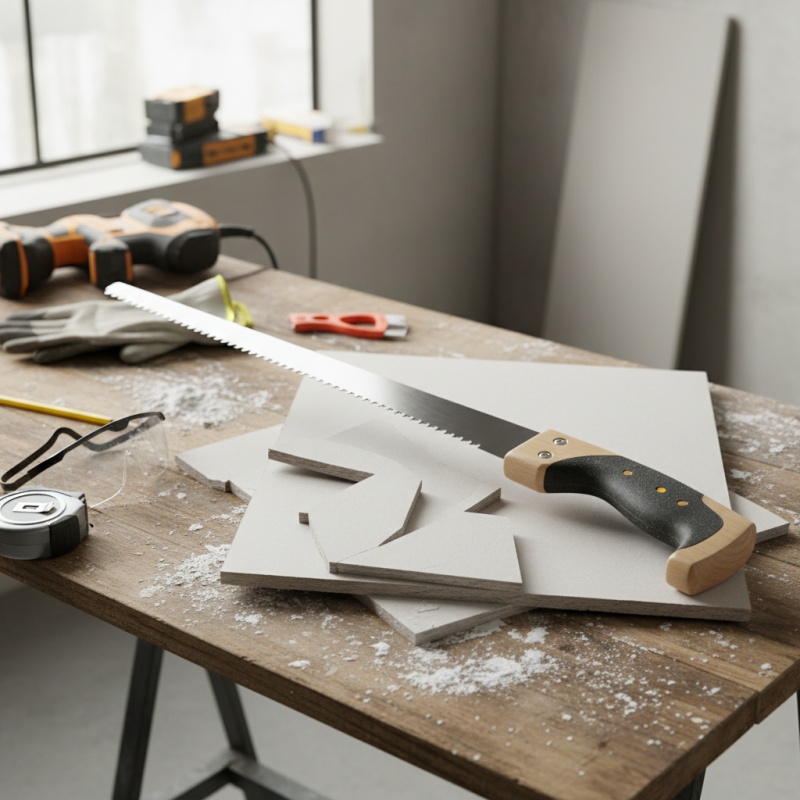
When tackling DIY projects involving plaster, understanding plaster saws is essential. There are several types of plaster saws, each catering to different needs. The traditional plaster saw has a wide, serrated blade. It efficiently cuts through plaster but may struggle with harder surfaces. A key benefit of this saw is its affordability, making it ideal for beginners.
Another type is the multi-tool. These tools come with various attachments for different tasks. They provide more versatility, allowing you to cut, sand, and scrape. However, they may require a learning curve. Some users report frustration with settings and performance. An electric plaster saw offers speed and precision. These saws work well for larger projects. Yet, they can be more expensive and cumbersome to use in tight spaces.
Tips: Always wear protective goggles when cutting plaster. Dust from plaster can irritate your eyes. When using a plaster saw, let the tool do the work. Pushing too hard can result in uneven cuts and potential damage. Remember to choose the right saw for your project size. A small task doesn’t need a heavy-duty tool. This approach can save you time and frustration.
Key Features to Look for in a Plaster Saw
When choosing a plaster saw, certain key features can enhance your DIY projects. The blade is crucial; a fine-toothed blade works best for smooth cuts. Look for a comfortable handle, as you’ll be working for extended periods. A good grip reduces fatigue. The saw should also be lightweight, making it easier to maneuver.
Length matters, too. A longer blade can handle larger sheets of plaster. However, it may complicate small cuts. Consider your specific projects before deciding. It's also beneficial if the saw has a straight edge for accuracy. Ensuring that every cut is as close to perfect as possible is important, though achieving perfection can sometimes feel out of reach.
Some users grapple with unwieldy saws. They can slip or cause uneven cuts. Practicing on scrap pieces can help. It’s wise to accept that some mistakes will happen. Refining your technique is part of the learning curve. Embracing these imperfections will improve your skills over time, resulting in better outcomes.
Top Recommended Plaster Saws for DIY Enthusiasts
Choosing the right plaster saw can significantly impact your DIY projects. Many tools on the market cater to various needs. A good plaster saw should offer precision and durability. Look for features like a comfortable grip and a sharp blade. These can enhance your control during cutting tasks.
Some popular types include handheld and powered saws. Handheld saws provide excellent maneuverability, especially in tight spaces. However, they may require more effort. Powered saws, on the other hand, can save time and energy but might be overkill for small jobs. It's essential to weigh your options based on the project at hand.
Keep in mind that not all users may achieve perfect results on their first try. Practice makes perfect, and familiarizing yourself with your tool is crucial. Mistakes can happen, such as uneven cuts or making too deep of a slice. Learning to address these errors will improve your skills. Embrace the journey of mastering your plaster saw. Each project is an opportunity for growth and exploration.
Safety Tips When Using a Plaster Saw
When embarking on DIY projects involving plaster, using the right tools is essential. A plaster saw can make your tasks easier. However, safety must come first. Dust from plaster can cause respiratory issues. A report by the National Institute for Occupational Safety and Health indicates that prolonged exposure to gypsum dust could lead to serious health problems. Always wear a mask that fits well.
Protective eyewear is also crucial. Flying debris can cause severe eye injuries. According to the American Academy of Ophthalmology, over 2.5 million eye injuries occur each year due to home improvement activities. Using safety goggles instead of regular glasses can greatly reduce this risk.
Tips:
Consider working in a well-ventilated area. This will help dissipate dust quickly. Keeping your workspace organized can minimize accidents. Ensure tools are in good condition, as worn ones can malfunction. Regularly check your workspace for hazards, and adjust as needed. Taking these small steps can significantly enhance your safety while enjoying your DIY plaster projects.
Maintenance and Care for Long-lasting Performance
Proper maintenance is essential for extending the life of your plaster saw. After each use, clean the blade thoroughly to remove any residue. A simple brush or cloth can do wonders. Don't forget to wipe down the handle as well. A clean saw operates more efficiently and safely.
Inspect the blade regularly for nicks or dullness. If you notice any issues, take time to sharpen or replace it. Dull blades can cause frustration and lead to poor cuts. The effort put into upkeep will pay off. Store your saw in a dry place to prevent rust. A dedicated space prevents accidental damage and keeps everything organized.
Consider creating a maintenance schedule. Regularly checking your tool can catch potential problems early. Documenting your maintenance activities helps track wear and tear. It also reminds you of what tasks need to be completed. Taking responsibility for your tools reflects on the quality of your work.