|
Undo can be carried out up to 5 times. |
 |
Redo can be carried out once. |
 |
Save (comp. keyboard command ). |
 |
Graphics print.
Graphics and texts are output on the standard printer. Exported are all layers which are marked in colour in ascending order (0..MaxLayer). Layers which are not to be printed are to be marked in white by clicking-on. Current information on this can be found in the program aids , [?].
|
 |
Machine output direct mill auto.
Output the milling data on the standard machine. Exported are all layers which are marked in colour in ascending order. Layers which are not to be exported are to be marked in white by clicking-on.
By clicking-on using you reach the setup aid for the standard output. For the output at least one matching path (output program) and one data path are required. Current information on this can be found in the program aids , [?].
|
 |
Position selection (marking aid).
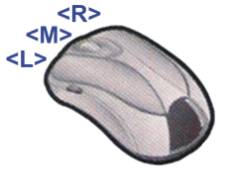
The selected path is drawn in red and marked with 8 mark points. In he text module with this section aid text rows are marked (on its source point). Click with <m, f2=””> onto the position selection opens a menu.</m,>
| Deselect all: |
All marking is cleared. |
| Mark all: |
All paths are marked. |
| Mark Track Posn: |
Select a route using a support point or through cutting using a rectangle. |
| Mark in Layer: |
Search for the next path in all layers. |
| Deselect: |
Deselect a marked path. |
| Paths – Info: |
Show information on the marked paths. |
| Cut out ,
copy ,
input : |
Exchange marked path via the program clipboard. |
| Group: |
The paths are ‘combined’ into a block. |
| Cancel Grouping: |
A grouping is cancelled. |
Note: Group is only sensible together with relief design (ReliefVTR module). |
 |
Position marking: Point and direction marking of the vectors. Mark the starting points, the supporting points with directions and the end points on all contours and routes in the ActLayer.
| Green square |
Start point of the traverse. |
| Arrow |
Support point and direction indicator. |
| Red triangle |
End point of the polygon. |
|
 |
Cutter track: representation with tool width.
The picture is drawn with the wide cutter track of the layer tools. Depending on the setting in input parameters, colouring will show the cutter width in relief surface height (for texts in surface and base height) or only in base height. A tool must be input for this function! |
 |
Graphic ZOOM +: enlarge picture.
Frame a picture detail with a rectangle and present enlarged.
After clicking-on using you obtain a zoom selection depending on the module.
|
 |
Graphic ZOOM -: reduce picture.
Redraw the picture half-size. After clicking-on using you obtain a zoom selection depending on the module.
|
 |
Graphic picture NORM: picture on preset limits. |
 |
Graphic picture New: redraw picture with current settings. |
 |
Graphic All: show all picture components (also outside the limits). |
 |
Graphic Displace: Relocate picture section.
Relocate the graphic using the cursor. For this click-on a point, using the pressed key move into the end position and release the key. The graphic is now so displayed that the clicked-on point lies in the end position. In combination with the function can be activated repeatedly without the button having to be clicked-on using the cursor.
|
 |
Graphic Selection: select picture section in the window. |
 |
Graphic background: create background picture.
Fade in a background graphic. The choice is dependent on the program version. The pictures can only be used if the appropriate data exists in the modules.
 |
Indicating of setting/selection:
| Black: |
Current selected background. |
| Blue: |
The setting can be selected. |
| Grey: |
The setting is not possible (no data in the module). |
|
| Bkgd picture: |
Show background picture. |
| Relief: |
Show relief graphic in the background. If the graphic in the relief module is set to render (standard), then the relief in the background graphic is also rendered. For all other graphic settings the normal grey scale representation is drawn. |
| Scan: |
Using a scanner graphic in the background processing can be carried out only using whole number enlarging/reducing factors (1,2,…n). The max. enlargement is 8. |
| Load bkgdpicture: |
Load a background picture in BMP-, PCX-, GIF- (256 grey shades), JPG-, JPEG- or in relief format. The background picture is always loaded with the zero pint bottom left. The picture dimensions for GIF graphics can be determined in the interrogation Relief Dimensions. For pictures in BMP-, PCX-, JPG- and JPEG format the dimensions are calculated from the picture data. |
| Background setting: |
| Background contrast [1..10]: |
The background picture is usually presented faded in order to recognise still clearly the input on to the background graphic. Setting 1 results in a very faint picture, Setting 10 results in normal picture contrast with dark elements. Standard setting = 5. |
| Background inverse: |
| YES: |
The background picture is shown with inverted grey shades. I.e. dark points on the picture are shown light, light points are shown dark. |
| No: |
The background picture is shown using the specified grey distribution. |
|
|
|
 |
Input parameters (Program settings).
Current information can be found in the program help .
|
 |
Help: if you have questions on operation then please first use the installed Help. You can access Help also with already activated function by using or using the aid ? Help and click-on the function. |
 |
Select ActLayer: All operations are carried out using one layer of the ActLayer (current or active layer). The desired layer is selected here. All layers are of the same value! The layers can be provided with a name in the tool input (Engraving, Text,..). Layers, which are allocated data are marked with the number of support points , empty layers with 0. The second marking denotes the number of lines of text.
By clicking on the symbol elements alongside the layer indicator the graphic for this layer can be switched to ‘inactive’ (= white) or ‘active’ (= layer colour).
|